Running transactions
The Run tab is an important section of VIDE. It allows you to send transactions to the current environment.
 image
image
Run Setup
The following settings allow you to directly influence the transaction execution:
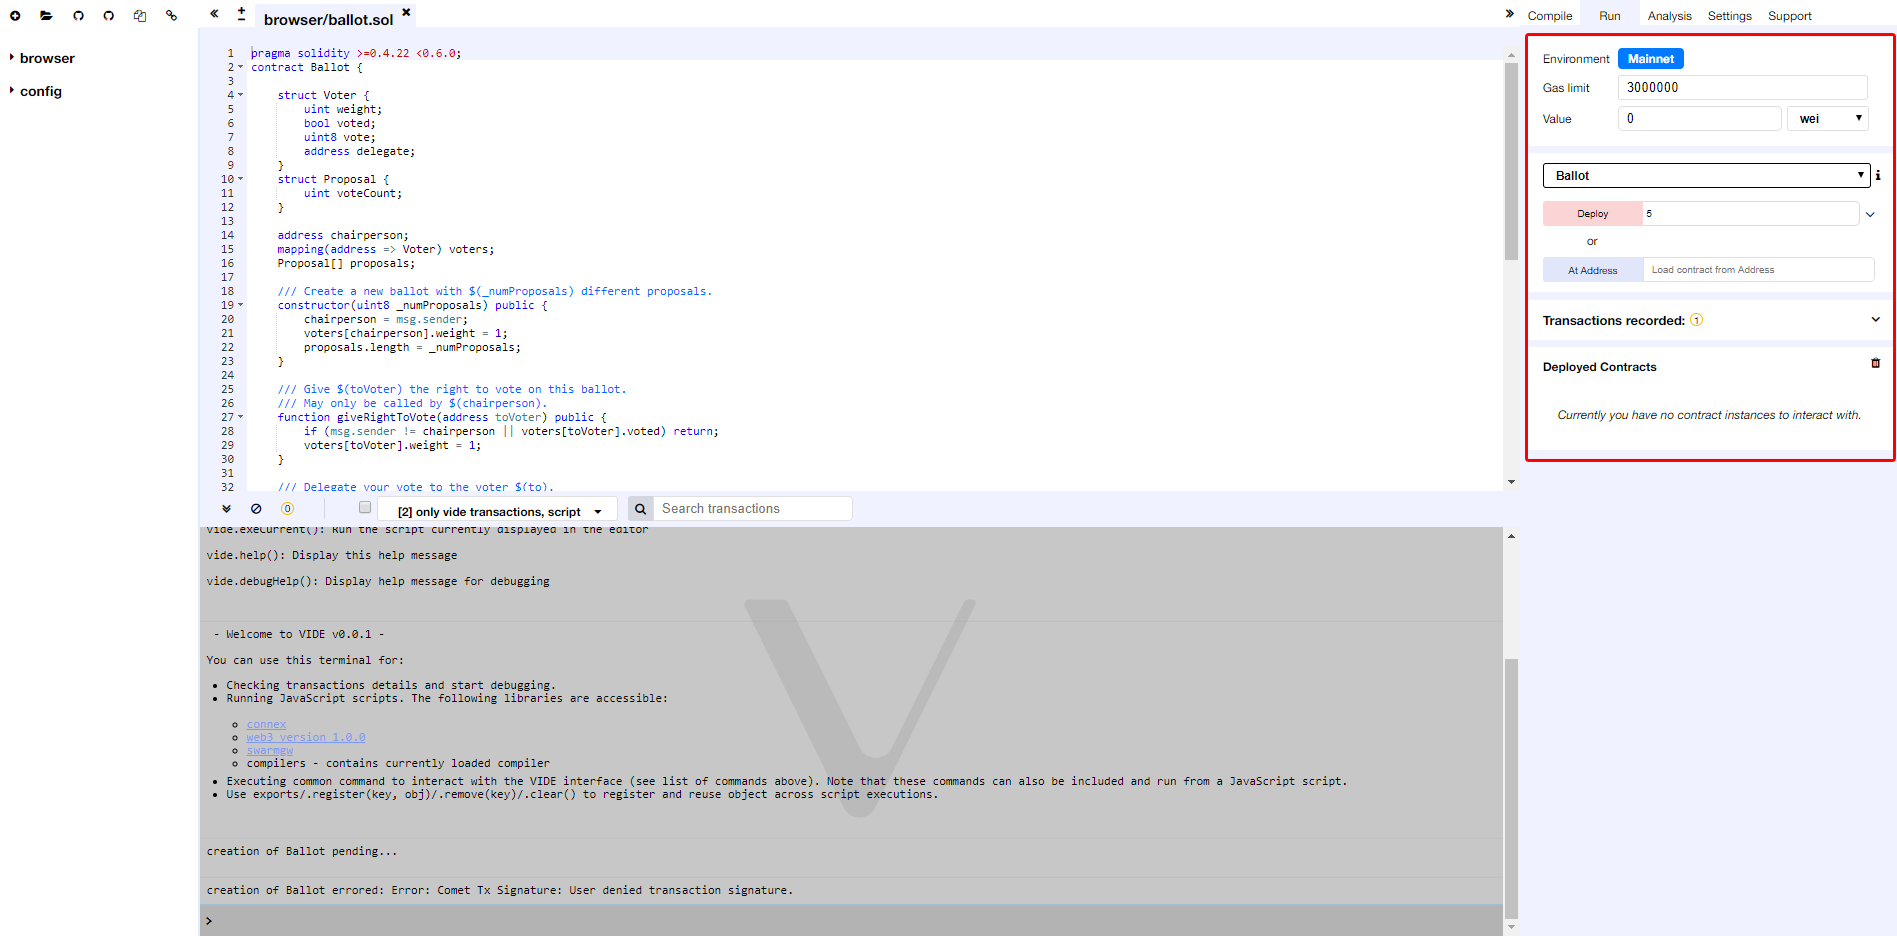
Environment:
MainnetorTestnet: VIDE will connect to an injected Connex provider.SyncandCometare example of providers that inject Connex, thus can be used with this option.- Gas Limit: the maximum amount of gas that can be set for all the transactions created in VIDE.
- Value: the amount of value for the next created transaction (this value is always reset to 0 after each transaction execution).
 image
image
Initiate Instance
This section contains the list of compiled contracts and 2 actions:
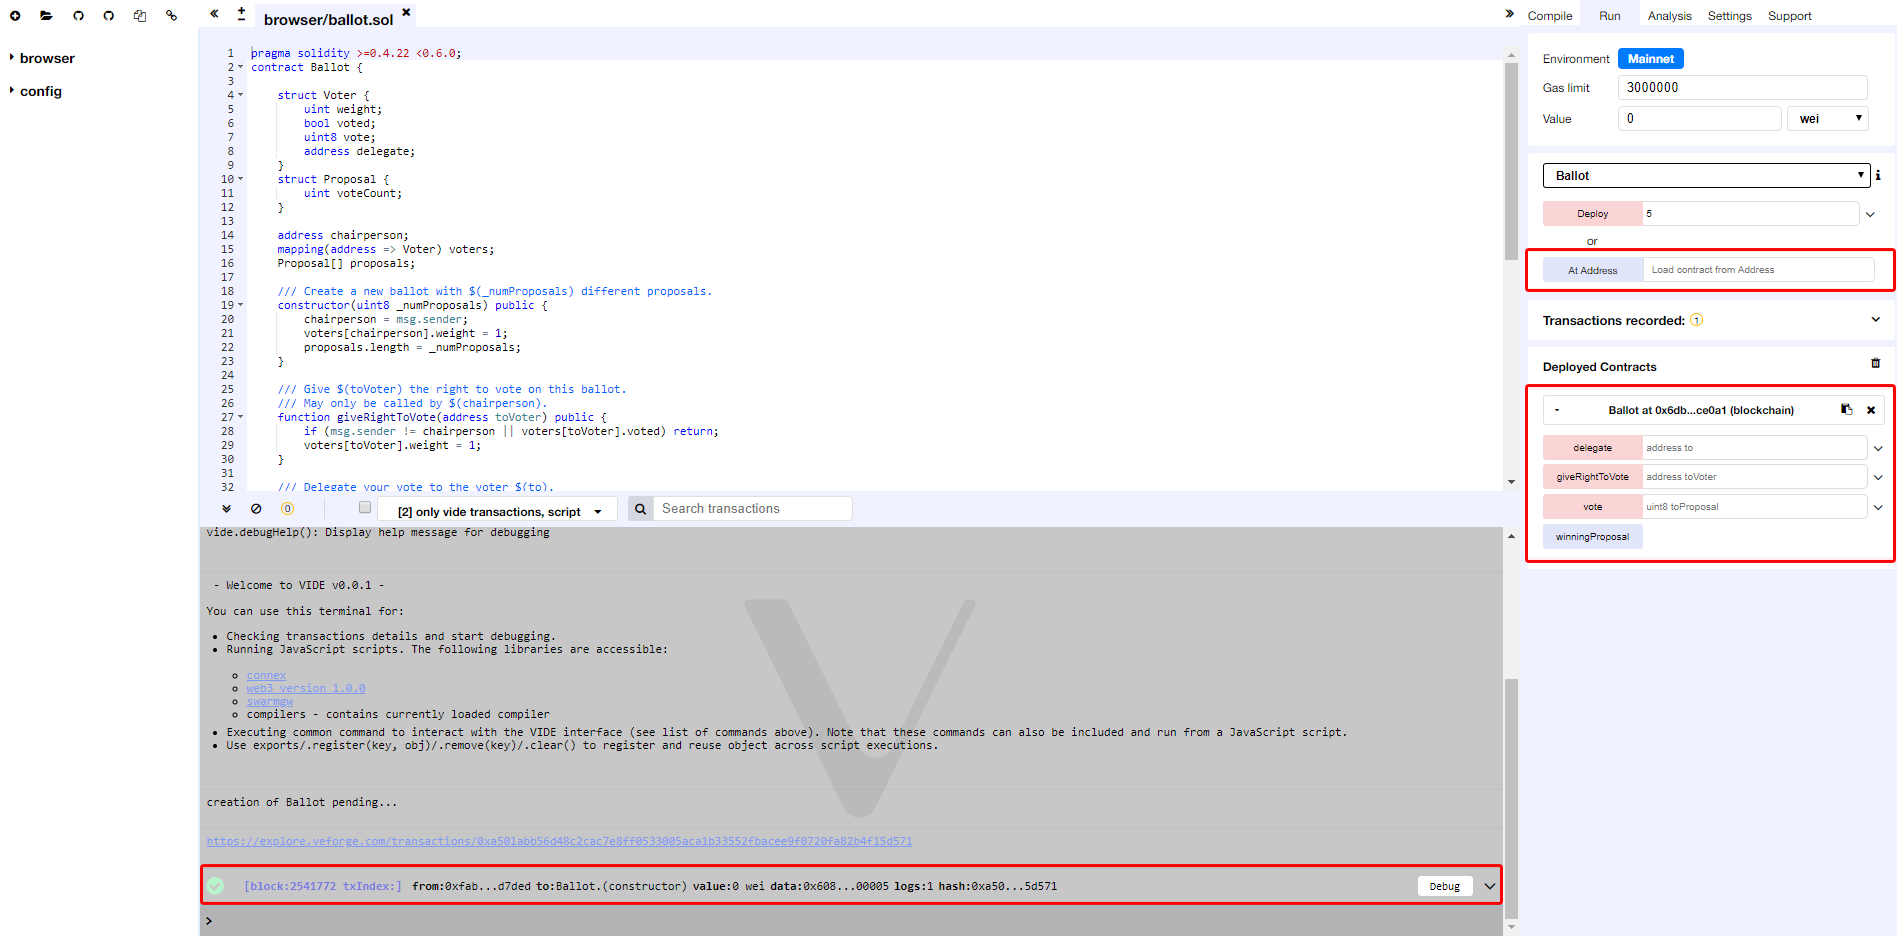
At Addressassumes the given address is an instance of the selected contract. It is then possible to interact with an already deployed contract. There’s no check at this point, so be careful when using this feature, and be sure you trust the contract at that address.Createsend a transaction that deploys the selected contract. When the transaction is mined, the newly created instance will be added (this might take several seconds). Note that if theconstructorhas parameters, you need to specify them.
Pending Instances
Validating a transaction take several seconds. During this time, the GUI shows it in a pending mode. When transaction is mined the number of pending transactions is updated and the transaction is added to the log (see ../terminal)
Using the ABI
Using Deploy or At Address is a classic use case of VIDE. It is
possible though to interact with a contract by using its ABI. The ABI is
a JSON array which describe its interface.
To interact with a contract using the ABI, create a new file in VIDE
with extension *.abi and copy the ABI content to it. Then in the input
next to At Address, put the Address of the contract you want to
interact with. Click on At Address, a new “connection” with the
contract will popup below.
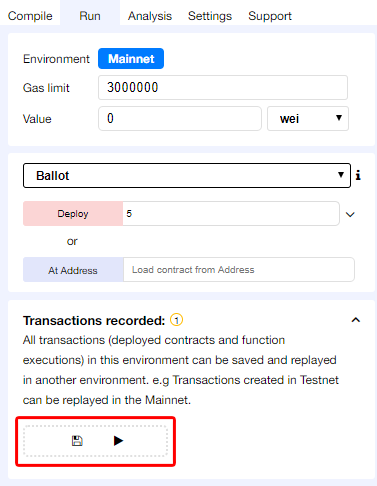
Using the Recorder
The Recorder allows to save a bunch of transactions in a JSON file and rerun them later either in the same environment or in another.
Saving to JSON allows to easily check the transaction list, tweak input parameters, change linked library, etc…
We can find many use cases for the recorder, for instance: : - After having coded and tested contracts in a constrained environment (like the Testnet), it could be interesting to redeploy them easily in a more persisted environment (like a Mainnet) in order to check whether everything behaves normally in a classic environment. - Deploying contract does often require more than creating one transaction. - Working in a dev environment does often require to setup the state in a first place.
 image
image
Saving a record ends up with the creation of this type of content (see below):
In that specific record, 3 transactions are executed:
The first corresponds to the deployment of the lib testLib.
The second corresponds to the deployment of the contract test, the
first parameter of the constructor is set to 11. That contract depends
on a library. The linkage is done using the property linkReferences.
In that case we use the addres of the previously created library :
created{1512830014773}. the number is the id (timestamp) of the
transaction that leads to the creation of the library.
The third parameter corresponds to the call to the function set of the
contract test (the property to is set to: created{1512830015080}) .
Input parameters are 1 and
0xca35b7d915458ef540ade6068dfe2f44e8fa733c
all these transactions are created using the value of the accounts
account{0}.
{
"accounts": {
    "account{0}": "0xca35b7d915458ef540ade6068dfe2f44e8fa733c"
},
"linkReferences": {
    "testLib": "created{1512830014773}"
},
"transactions": [
    ...
],
"abis": {
    ...
}
}